|
And boy did we celebrate. The most important part is my Nicholas’ birthday. He’s our firecracker baby. The first eight years of his life, he believed the fireworks were for him. I’m still not sure they aren’t. Nicholas, in case you forgot, is my great-grandson and his grandpa’s favorite playmate. They do everything together. From putting boxes and boxes of Lego’s together, to playing video games. If they get tired of those, they take a dunk in the pool. There’s a never-ending stack of board games in the closet. They always have something to do. The second thing we celebrated, of course, was July 4th and our Independence Day. About 5 days before the 4th, hubby received a phone call from some friends asking if ‘we are still on for the 4th?’ When hubby talks on the phone, he has it on speaker and I’m sitting close by and hear the whole conversation. He got off the phone and I asked, “and when were you going to let me know there are twelve more people coming and expecting to eat?” “I forgot.” That’s nothing new. We had already invited the neighbors and there are seven of them. Plus, our bunch makes ten more. Are you doing the math? That makes twenty-nine. (I think) So, I start rounding people up. Granddaughter, Nicholas’ mother, had a brisket buried in her freezer. Thank goodness because I wasn’t sure I could afford the price they are right now. I recruited my daughter to make a watermelon salad, and a black-eyed pea salad. I cooked the brisket, potato salad, baked beans, (recipe follows) and banana split cake. Needless to say, everything turned out great. Food was awesome. Everyone swam and we had a great time. Later, everyone went to watch the fireworks at Overton Park. The next day, hubby and I rested. All day long. Now for the recipe. I have never met a man, or woman, who didn’t love this recipe. You must try it at your next barbeque. Enjoy. Three Bean Baked Beans½ lb. ground beef 5 bacon, diced
½ cup onion, chopped 1/3 cup brown sugar 2 cans (16oz) pork and beans ¼ cup sugar 1 can (16oz) butter beans (rinsed & drained) 1 can (16oz) pintos with jalapeno (rinsed & drained) ¼ cup ketchup ¼ cup barbeque sauce 2 Tbsp. molasses 2 Tbsp. mustard ½ tsp chili powder ½ tsp salt In large skillet over medium heat, brown beef, bacon, and onion. Drain beans. Combine remaining ingredients, stir into bean mixture. Pour into a greased casserole (2-1/2 quart) baking dish. Bake uncovered for 1 hour at 350 degrees or until beans reached desired thickness.
4 Comments
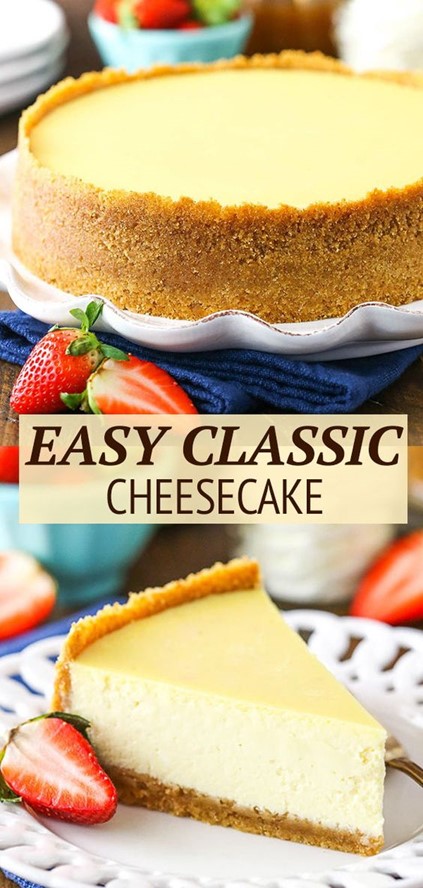
This is Magnolia May Beckham. She is one week old as of Wednesday, April 1, 2021. She is my second great-grandchild, and my first great-granddaughter. I haven’t met her yet, but I can’t wait. Maggie came to live with Mom, Dad, and her two brothers on March 25th, 2021. I’ve seen a picture of her once, and she was staring at her dad, Chase, my grandson. I think she is perfectly beautiful, and I can’t wait to spoil her. But that will have to wait a little while until I can get a trip to Oklahoma. I got two baby blankets crocheted, and I’m working on another one. I may wait until she comes to visit to give this one to her. Keep watching my Facebook because I’ll be posting a lot of pictures. We got most of the garden planted and everything is coming up in spite of the cold snap we just had. My Wisterias are going to come back after that winter storm we had. I just don’t know how healthy they are going to look. We pulled up two of my evergreens and two Camellias. I’m not sure what else didn’t survive. I have ordered five Carolina Jasmines. After we pulled one down, I found it is coming back out from the bottom of the plant. I’ll be leaving that to let it grow. The hard one we must get down is on the pergola. That is going to be hard to get down. The other thing that is major right now is the shed. Steve found the bottom boards on the south side are rotten and the floor on that side is caving in. So, he is taking that side apart and replacing the boards. It’s not termites. I think it’s wood ants. Always something. My Jeannie has been staying with me for a while she recoups. I have really enjoyed having her. We’ve been cooking, shopping, visiting, going to doctors, etc. I’ll miss her when she goes home. I’ve cleaned out five flower beds, and I’m working on the beds around the pecan trees. I’ve put plants in five pots, emptied a bunch of others, and I’ll put plants on the two pots on the patio and I’m done. Not putting plants in all the pots this year. I’ll be storing the soil and washing the pots. I have way too many plants. We have tried so many new Keto recipes that I can’t decide which one to post. I made a cheesecake that fell apart but, dang, it was good. With caramel sauce on top…yum. I’ll give you that one. Hope you enjoy. This is the basic Keto cake, and you can add any topping you want. We just wanted caramel. Steve ate all but three pieces. The Best Keto Cheesecake Recipe Creamy and DreamyFor the crust
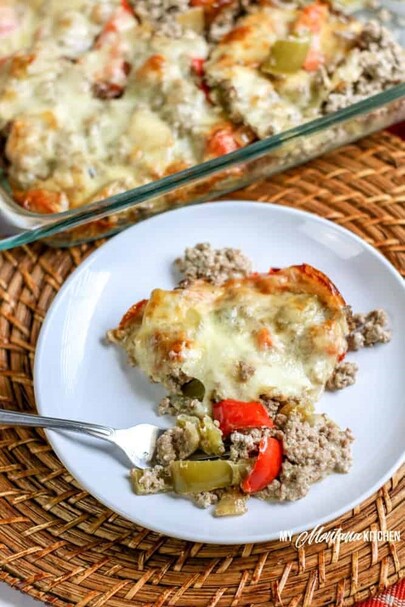
2 Cups Almond Flour ¼ Cup powdered sweetener (SoNourished) 6 tbsp Butter melted 1 tsp Vanilla Extract For the filling 5 (8oz ea.) packages full-fat cream cheese room temperature 2 cups powdered sweetener (SoNourished) 5 Large Eggs room temperature 8 oz. Sour cream room temperature 1 tbsp Vanilla Extract Instructions Preheat the oven to 325°F / 160°C. Adjust the rack to the middle of the oven. Crust In a medium bowl combine the almond flour and powdered sweetener. Add in the melted butter and vanilla extract. Use a spatula or a fork to combine well the ingredients. Pour the crust mixture into a 9″ spring form pan and press firmly into the bottom and halfway up the sides using a spatula or your fingers. Refrigerate the Keto crust for 20 minutes. Cheesecake In a large mixing bowl, add the softened cream cheese and beat with a hand mixer until smooth and fluffy, scraping the sides if necessary. Turn the mixer to a lower speed and add in the powdered sweetener little by little. Add the eggs one by one and stir until just incorporated. Incorporate the sour cream and vanilla extract. Use a spatula to scrape the sides and bottom of the bowl. Pour the cheesecake batter over the crust and even out the top using a spatula. Transfer to the preheated oven and bake for about 50-55 minutes. You know it’s ready when the edges have a pale brown color, and the center is firm but “jiggly” like Jell-O. Remove from the oven and allow to cool at room temperature for about one hour before transferring to the refrigerator. Refrigerate overnight or at least 6hours before serving. Enjoy I checked. It was April 2019 since I wrote my last post. You will not believe everything that has happened since then. We lost one of our Maltese, Cody, to a brain tumor. That was a hard blow. My granddaughter, Brittany, moved out in July 2019 and then on September 10, 2019 she died. Just 34 years old. Another hard blow. We were planning a trip to Disney in 2020 and COVID struck. We have been lucky, but some of our other family members have not been so lucky. We lost hubby’s sister, Nancy, we think to an aneurism and his sister-in-law, Sharon, to COVID. Our pastor, Rohn Boone has been in the hospital for over four months with COVID and doesn’t seem to be getting better. I lost Cookie and Cutter, my other two Maltese, in 2020. We said no more animals, but I found Cappy and Ginger and they are a joy. October 4th, 2020, we lost our son, Craig, in a freak accident. He gave his life to save another. We’re still not over that. He was either talking to his dad or here helping his dad every day he didn’t work. I miss him dearly. I have stopped writing, and I’m not sure I’ll pick it back up or not. The cost of publishing outweighs sales. But I’m willing to help others in any way I can. I am on a diet, sort-of. Cooking Keto but not completely. My weight goes up then down on a daily basis. I just can’t seem to get it right. But I’m not giving up. One day I’ll get it right. In the meantime, I’m posting a Keto recipe that we’ve tried and love. I like easy and quick. So that’s what I try to find. This is one of our favorites. Hope you enjoy it. Oh yeah, I’ll try to post an update once a month. Low Carb Philly Cheesesteak CasserolePrep Time 10 minutes
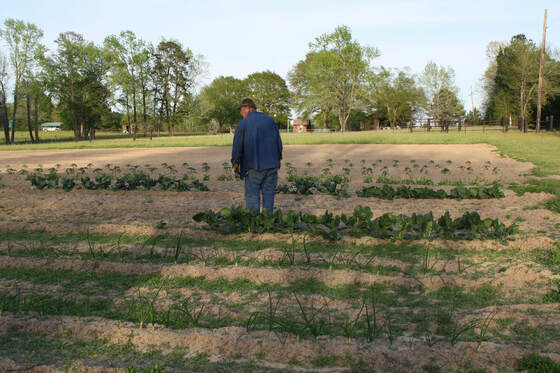
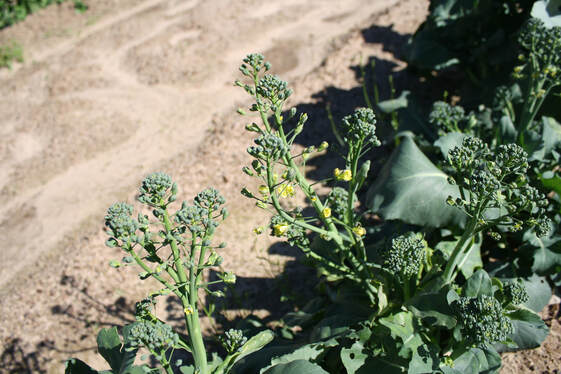
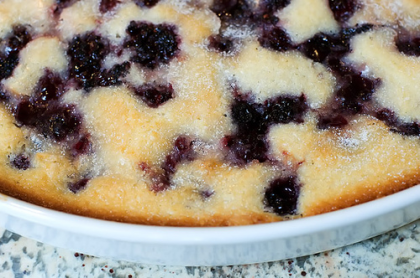
Cook Time 30 minutes Total Time 40 minutes Yields 12 servings Ingredients 2 Pounds Ground Chuck (Beef), browned and drained 1 Tablespoon Coconut Oil, optional 2 Bell Peppers, seeded and sliced 1 Large or 2 Small Onions, sliced 1 (8 ounce) Package Cream Cheese, softened ½ Teaspoon Garlic Powder Salt and Pepper, to taste 12 Slices Provolone Cheese Instructions 1. Preheat oven to 350 degrees. 2. Prepare a 9x13 casserole dish with coconut oil spray. 3. In a large skillet, brown ground beef over medium-high heat and chop into crumbles. 4. Drain ground beef to remove grease. 5. If grease is removed from skillet, add coconut oil and swirl to coat the pan. 6. Add onions and peppers to skillet, cooking over medium-high heat and stirring occasionally until softened. Remove from heat. 7. To the skillet, add cooked ground beef, cream cheese, garlic powder, salt and pepper. Stir to combine. Transfer to casserole dish. 8. Top casserole with slices of provolone cheese. 9. Bake for 25 to 30 minutes or until cheese is melted and bubbling. I tell you, folks, I am chomping at the bit to visit a nursery and buy a boatload of flowers. However, this cold front came through, and now, April 1st, 2019, I’m sitting here in sweat pants and a sweatshirt with a burning fireplace. It’s cold. The good news is we have everything in the veggie garden planted. I am praying this cold snap doesn’t kill anything. I’ll post another picture when everything comes up. We planted cabbage, Brussel sprouts, cauliflower, and broccoli. This is my first time to plant those, and I have broccoli that will need to be cut soon. I just don’t know how to freeze the surplus. Guess I’ll blanch them and then freeze. So far, everything I’ve done that to has been successful. Note: The above was written 12 days ago and I’m just now getting around to finishing it. We do love our vegetables. There is nothing like fresh squash or cream peas. Yum. I’m getting hungry just thinking about them. When I cut the broccoli they were starting to bloom. Let me tell you, they were bitter. I learned that once the plant starts to bloom, it’s done. The broccoli was small and not enough for a meal. I’m not writing much. Which is why I haven’t posted a newsletter lately. I have the 3rd book in Weber, Texas series about 1/3 finished. Hidden Treasure may never make it to the publisher, but at least it’ll be completed. If someone wants to read it (as is), I’ll send it to them. No charge. I’ll feel better knowing I did finish it. I thought of what will be in the Hidden Treasure, and it will be a huge surprise to everyone. I’ve had it on my mind for some time and couldn’t figure out what the ‘Hidden Treasure’ would be. Should it be gold bars, cash, deed to the property, what? Then I thought, ‘why does it have to be a real treasure? Why can’t it be something so far out in left field’…anyway, I think I’ve got it. The recipe this month is one I’ve cooked twice and will cook it again. It’s not Keto, but I just ran around the house a couple of times. I’m sure that took off the extra pounds I gained with this Blackberry dessert with ice cream on top. This is the Pioneer Women’s recipe, and I’ll try anything she puts out. Try it, you will love it. Blackberry Cobbler #1by Ree | The Pioneer Woman
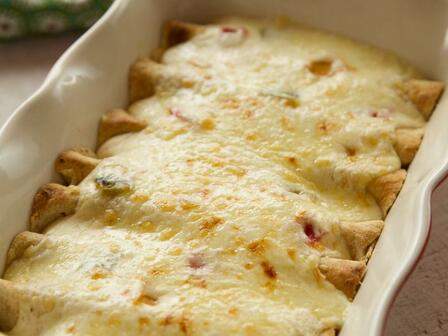
Desserts, Pies Webpage: https://thepioneerwoman.com/cooking/the_great_cobbl/ Prep: 20 Minutes Level: Easy Cook: 1 Hours Serves: 8 Description This is my favorite version of cobbler. It's cakey and sweet and can really stand on its own without a creamy accompaniment such as ice cream or whipped cream. Ingredients • 1 stick Butter • 1-1/4 cup Sugar • 1 cup Self-Rising Flour • 1 cup Milk • 2 cups Blackberries (frozen or fresh) Preparation Melt butter in a microwavable dish. Pour 1 cup of sugar and flour into a mixing bowl, whisking in milk. Mix well. Then, pour in melted butter and whisk it all well together. Butter a baking dish. Now rinse and pat dry the blackberries. Pour the batter into the buttered baking dish. Sprinkle blackberries over the top of the batter; distributing evenly. Sprinkle ¼ cup sugar over the top. Bake in the oven at 350 degrees for 1 hour, or until golden and bubbly. If you desire, sprinkle an additional teaspoon of sugar over the cobbler 10 minutes before it’s done. New beginnings, new resolutions, and a new priority. Resolution #1: I’m going to stick to a diet. Let me explain. I have never had to go on a diet in my life. I have weighed between ninety-eight and one hundred and ten pounds my whole life. The problem I’ve always had was being underweight. Once, I had to drive to Dallas to get a pair of jeans I wanted in a size two. Two, that’s size 2. Now, I am twenty pounds overweight, and I’m dropping the pounds one at a time. It’s hard. I can sympathize with those who deal with being overweight. Resolution #2: I’m not going to publish anymore books. The reason for that is cost. For an author, unless they have a publisher, will spend anywhere from $500.00 to 5,000.00 plus just to publisher the words they have spent weeks, months, or years to write. That includes, but not limited to, beta readers (some charge), editors, proofreaders, a line editor, a book cover designer, printed book markers, and other advertising material. That does not include advertising, which can exceed way more than any of the above. Bottom line, it is costing me more to put out a book than I’m making on sales. That could be because the market is flooded with indie authors or my stories are not as good as some of the other authors. Being an author is hard work. Your hourly pay is pennies a day. You still have a job, children, a husband, a house to take care of, and errands to run. You live a solitary life glued to a computer, your eyes start fading, you never get enough exercise, family is neglected, etc. I want more out of my retirement than the above. The funny part about my news – my hubby said, “you need to continue writing, we need the tax deduction.” Now, for my final announcement. January 17th is my birthday. For my special day, I will be giving away a complete set of one of my series. Be it an eBook or signed copies of the books. All you need to do is tell me the name of the 4th book I wrote. Leave your answer in the comments here on my web page. You can access the comments at the beginning of this newsletter. The contest will end January 20th, 2019, and the winner will be announced Monday January 21st, 2019. Now for this month’s recipe. Another Ree Drummond recipe. Love that woman. White Chicken EnchiladasTotal Time: 1 hr 40 min
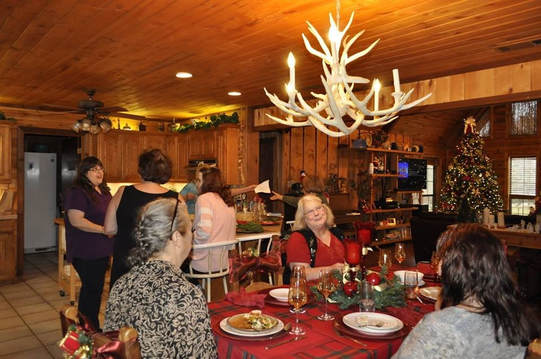
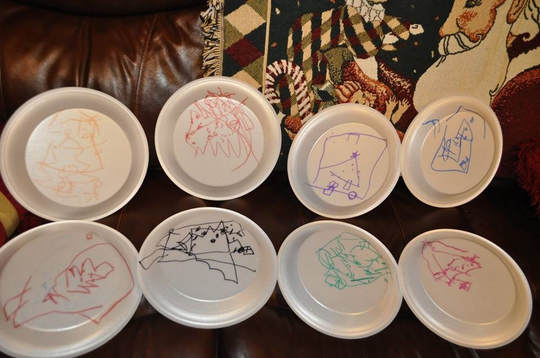
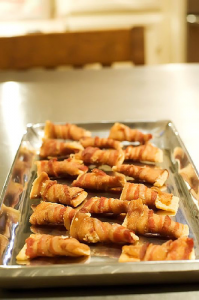
Yield: 8 servings Ingredients 4 boneless, skinless chicken breast fillets Kosher salt and freshly ground black pepper 2 tablespoons olive oil 2 green bell peppers 2 red bell peppers 2 yellow bell peppers 2 or 3 hot chilies, such as Serrano, jalapenos or the like 1 large onion, diced 1 jalapeno, seeded and finely diced 1 tablespoon vegetable oil 3 cups low-sodium chicken broth, plus more as needed 1 1/2 cups heavy cream 1 teaspoon paprika 4 tablespoons (1/2 stick) butter 1/4 cup all-purpose flour 3 1/2 cups grated Monterrey jack cheese 1 cup sour cream, plus more for serving 16 small corn or flour tortillas 1 cup store-bought salsa 1/4 cup fresh cilantro leaves Directions 1. Preheat the oven to 400 degrees F. 2. Sprinkle the chicken breasts with salt and pepper and drizzle with the olive oil. Put on a baking sheet and bake until just cooked through, about 15 minutes. Let cool slightly, then shred the meat with 2 forks. 3. Roast the bell peppers and chilies directly on a gas burner (or directly under the broiler) until the skin is mostly black. Throw the peppers and chilies into a plastic storage bag and seal it. Let them steam inside the bag for 30 minutes or so. Core and seed, then scrape off the black skin. Chop and set aside. 4. In a large skillet over medium heat, sauté the chopped onions and jalapeno in the vegetable oil until the onions are translucent, 2 to 3 minutes. Throw in the shredded chicken, then stir in 1 cup of the chicken broth and 1 cup of the heavy cream. Add 1/2 teaspoon of the paprika and some salt and pepper, then add half of the chopped roasted peppers and chilies. Stir the mixture around and let it cook for a couple of minutes, then set it aside. 5. In a separate skillet over medium-high heat, melt the butter. Sprinkle in the flour and whisk it together to combine. Cook, whisking constantly, for 1 minute. Then pour in the remaining 2 cups chicken broth, stirring constantly. Cook, stirring, until the mixture is smooth, 1 to 2 minutes. Then add the remaining 1/2 cup heavy cream, the remaining 1/2 teaspoon paprika and 1 1/2 cups of the grated cheese. Finally, stir in the sour cream and the rest of the chopped roasted peppers and chilies. If the sauce needs a little thinning, splash in as much broth as you need. Give the sauce a taste and add salt if it needs it (with all the cheese, it shouldn't need much). 6. Preheat the oven to 350 degrees F. 7. Wrap the tortillas in paper towels and microwave until very soft and pliable, about a minute. 8. Place a small amount of the chicken mixture and about a tablespoon of the grated cheese down the center of each tortilla. Fold over the edges and arrange them seam-side down in a 9-by-13-inch baking dish. Pour the sauce over the top. Sprinkle the top with the remaining 1 cup grated cheese and bake until bubbly, 20 to 25 minutes. 9. Serve with a dollop of sour cream and salsa on top and a sprinkle of cilantro leaves. Remembering Christmas’s past, all of our loved ones, those who we haven’t seen since last year, or those who are no longer with us. A time to enjoy all of our new arrivals, and seeing their tiny eyes light up as they view the bright lights for the first time. Seeing the twinkle in the older generations eyes as they watch everyone’s excitement. There is an embedded memory in their head that reflects on the times they, too, sat around the brightly lit tree and sang or listened as their mother or father read the story of His birth from the Bible. Then there are those who never had the luxury of a lit tree, presents under a tree, or believing in Santa. Their families were so poor they were lucky to get a piece of fruit. That’s why we adopt an angel, young or old, for an angel tree somewhere. These people don’t know where the gifts come from. They just know someone took the time and spent their hard-earned money so that someone who normally wouldn’t get gifts would have a Merry Christmas. Christmas is to celebrate Jesus’s birth. We do that by our gifts to others. I’m going to give all of my fans a gift. I have lowered the price of the Davis series eBooks to .99 for the next 5 days. It might take Amazon a day to update the price. The Davis series is two books you won’t be able to stop reading until the end. I promise. I also have other news. The Davis Series will be the last two books I’ll be writing. As of the time of this newsletter, I don’t intend to finish the third book in The Weber, Texas Series right now. I might work on it in the future. I do hope you have enjoyed my books and they will continue to be available on Amazon. I urge you to take advantage of the two books on sale. Now, as for Christmas, I hosted our Rose City Writers club Christmas party at my house, and it was a great success. We had more food than we could eat. I think everyone got full. We laughed through a game I made them play. They thought they would have to write something, but that wasn’t the case. All I can say about these very talented writers, they sure can’t draw. Now for the recipe of the month. Because everyone was bringing dips, chips, casseroles, salads, etc., I only made a couple of appetizers. This one was simple and everyone loved it. It came from my favorite cook, Ree Drummond. Try it for your next get together. Holiday Bacon AppetizersPrep: 30 Minutes
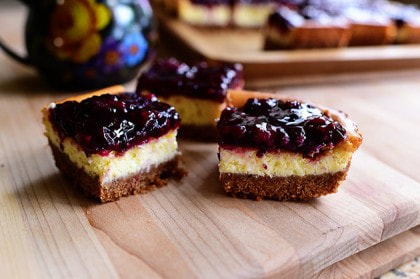
Cook: 2 Hours Serves: 36 Ingredients • 1 package Club Crackers • 1 pound Thin Sliced Bacon (or More Depending On Number Of Crackers) • Grated Parmesan Cheese • Optional Alternative: Brown Sugar Instead of Parmesan Cheese Preparation Lay crackers (as many as you want) face up on a cookie sheet. Scoop about 1 teaspoon of grated Parmesan cheese onto each cracker. Cut your package of bacon in half (or cut pieces individually) and carefully, so the cheese doesn’t fall off, wrap each cheese covered cracker in a one-half piece of bacon, completely covering the cracker. It should fit snugly around the cracker. Place the bacon wrapped crackers onto a baking sheet that has a rack on it. Place in a 250-degree oven for about 2 hours. We took off October 31st for Arkansas and hubby’s family reunion and spent that Saturday with his awesome brothers and sisters and enjoyed some great food. Leaving Arkansas that afternoon, we headed to Tennessee to see my oldest daughter. We drove most of the way, stopped for the night, then drove to her house Sunday morning. After a wonderful meal at her favorite Mexican restaurant, we went to Lowe’s for plants to put in the pots on her front porch. I wasn’t satisfied with just the pots, so we started adding things. A small bale of hay with a yard ornament stuck in the middle and a larger bale with two pumpkins on top. After that I was satisfied. It really looked great. We left Monday morning for Williamstown, Kentucky and The Ark Encounter. Our first dilemma was finding an RV park. There were only two within 20 miles. The second place we went had a spot, and we settled in for the night. Next morning, we headed for the Ark. It is huge. The inside is laid out with walls of clay pots that might have held food, cages of animals that weren’t real but looked like they could eat you alive, and life-sized wax statues of Noah and his family. It was four stories high, but the top story isn’t finished. It took all day to go through the Ark. We left Kentucky and headed to Washington, DC. We had a reservation at a KOA just outside the capital. Of course, it was higher than all the other KOA’s we stayed at, but they can get it because it’s close to DC. First thing next morning, we checked on the shuttle they advertise in the book. They stop running on Labor Day, so, we find out how to get to DC without taking our vehicle. We decide to ride the subway. That is, after we have someone else key in our pass card. They must be loaded every time you ride the Metro. And of course, we have no clue how to maneuver through their payment system. For three days, we had to find someone who could load our cards. Then on our last day, we were 50 cents short and couldn’t get off the Metro until we loaded the money. Washington, DC was fascinating. The first day, we walked over four miles, saw one museum, found ONE place to eat, bought souvenirs, and found our way back to our RV. I was very proud of us. The next day, we paid for a tour and it was well worth it. That’s the best way to see DC. We were going to stay one more day and paid another day, but I checked the weather and it was 100% chance of rain all day. So, we decided to come home. I didn’t get my lobster, but I did get Alaskan King Crab, and another time I got a crab cake that was huge. While on our tour bus, we stopped for lunch and I got a Philly Cheese Steak sandwich. It was awesome. The trip was great, and I want to go back. I asked Nicky if he wanted to go to DC. He said, “Yes, right after I go back to Disney.” Speaking of food, this month is a Ree Drummond recipe. I haven’t tried it yet, but I have all the products and may cook it for Thanksgiving. This is a sheet pan, blackberry cheesecake and it looks so good. Blackberry Cheesecake SquaresPrep: 4 Hours
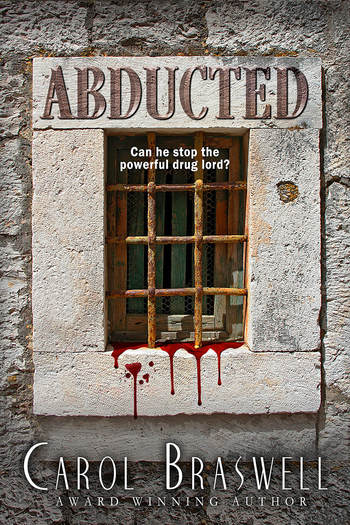
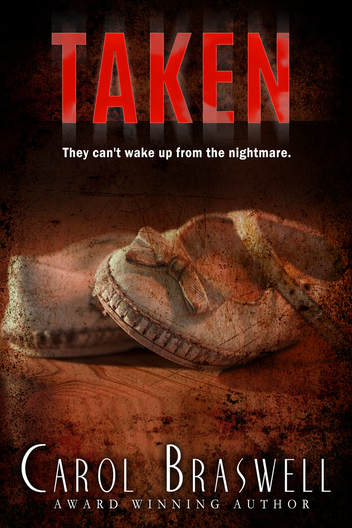
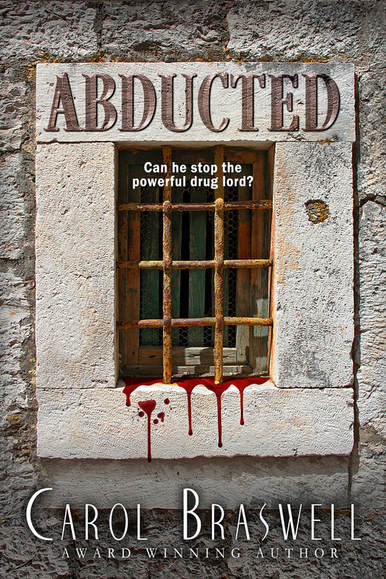
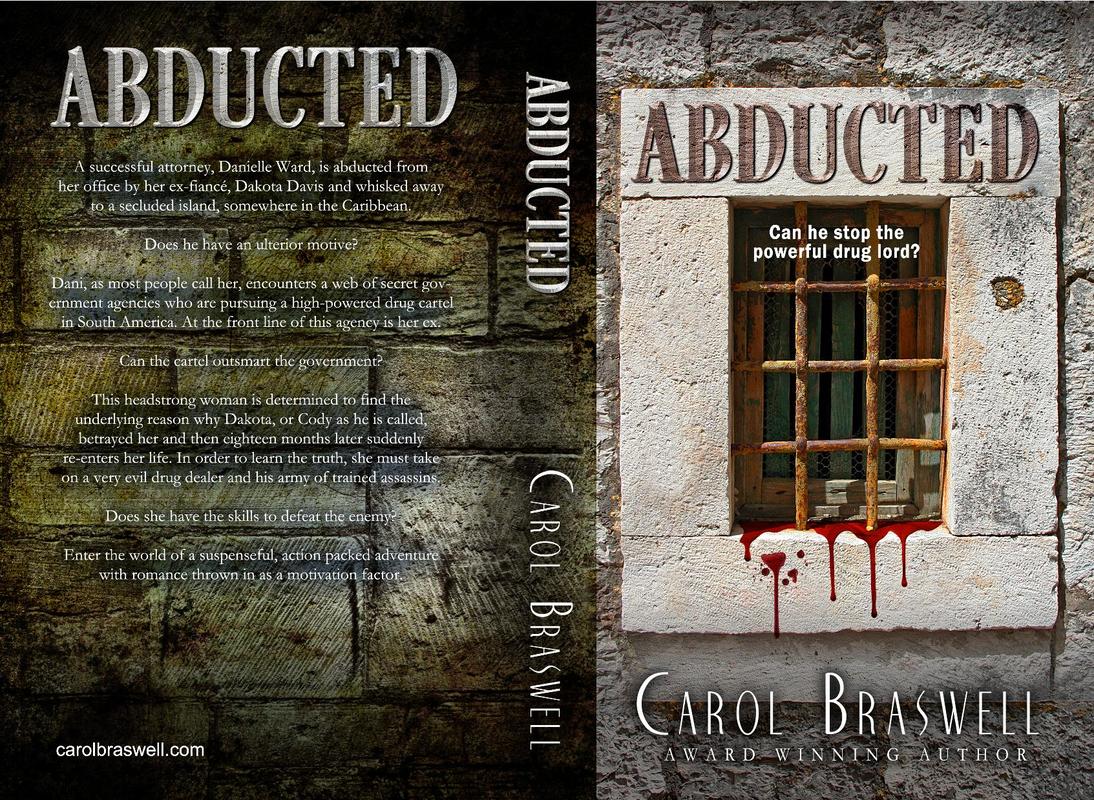
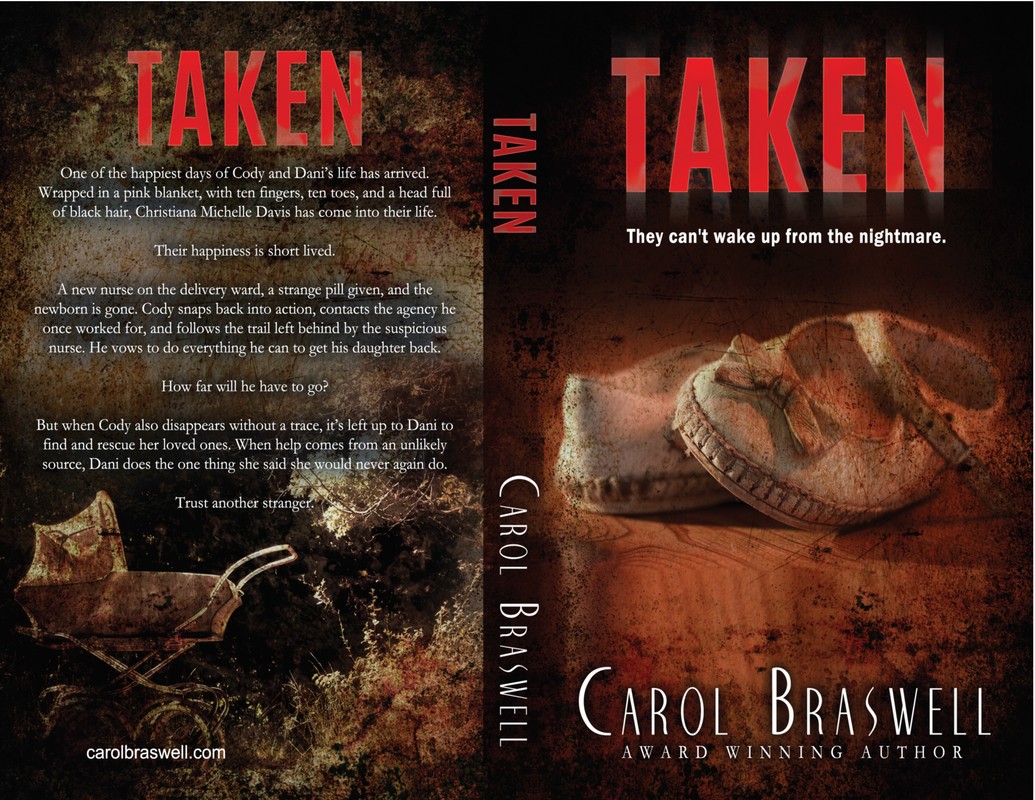
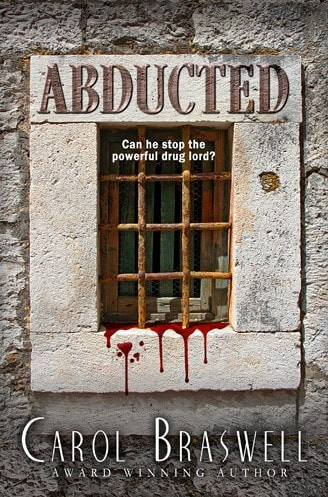
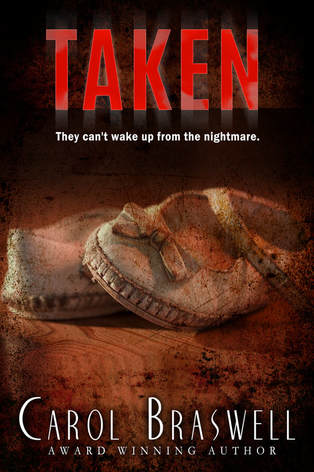
Cook: 2 Hours Serves: 16 Ingredients Crust 10 ounces, weight (2 Sleeves) Graham Crackers 1/2 cup Pecans Or Walnuts 1/2 cup Butter, Melted 1 teaspoon Vanilla Extract Filling 3 packages (8 Ounces Each) Cream Cheese, Softened 1-1/2 cup Sugar 1-1/2 teaspoon Vanilla Extract 4 whole Eggs 1/2 cup Sour Cream Topping 4 cups Blackberries 1 cup Sugar 1/4 cup Water 2 Tablespoons Cornstarch 4 Tablespoons Water Directions Preheat the oven to 350 degrees. Place a 9 x 13-inch pan (or another ovenproof pan) of hot water into the bottom rack. For the crust, line a separate 9 x 13-inch baking pan with foil. Spray with cooking spray. Add the graham crackers and pecans to the bowl of a food processor. Pulse them until they're fine crumbs. Drizzle in melted butter, pulsing until it's all incorporated. Pulse in the vanilla. Pour the crumbs into the prepared pan and press the crumbs firmly into an even layer. Set aside. Beat cream cheese, sugar, and vanilla together until smooth. Add eggs one at a time, beating after each addition. Add sour cream and beat until incorporated. Pour the filling into the crust and smooth the surface. Bake for 45 minutes, then turn off the oven and leave the door closed for an additional 10 minutes. Finally, open the door halfway and leave it in the oven for an additional 10 minutes. Remove the cheesecake and let it cool completely. For the topping, add blackberries, sugar, and 1/4 cup water to a saucepan. Bring it to a boil and cook until the juices thicken slightly, about 4-5 minutes. In a small bowl, mix the cornstarch with 4 tablespoons water to make a slurry, then add it to the berries. Let it boil for another 1 to 2 minutes, then turn off the heat and allow to cool. Pour the blackberries over the cheesecake and place the pan into the fridge to chill and set for at least 2 hours. When ready to serve, remove the cheesecake from the pan by lifting the edges of the foil. Peel back the foil and use a long serrated knife to cut cheesecake into squares. IT'S HERE! GET YOURS NOW! goo.gl/4f2FFX We finally made it to cooler weather. It may only be temporary, but at least it’s here now. My two Maltese are happy, and Ebby, my black cat, is happy. I don’t know, Ebby might be happy because it’s almost Halloween. All I know is we all love this weather. I took Nicky to Wal-Mart after his piano lessons this past Friday. He saw a costume he really wanted, so I told him to call his mom and ask if it was ok. She said yes, and we got it. Later, Hubby got a call saying there was a bear at my grandson’s house that he needed to come and see. Now for news on the books. After 2 months of major publishing issues with Abducted and Taken, I am happy to say things are finally looking up. All the problems that kept me from releasing them are getting resolved. I can’t tell you how relieved I am about this. I have had many sleepless nights, but now I can breathe easy. Abducted is out now, so make sure you use the link above or on the BOOKS page to get your copy. Taken will be out next week, and I’m working on Hidden Secrets and hope to have it finished and out by January. That makes 3 different series I have; The Garrett Series, The Weber, Texas Series, and The Davis Series. And now for this month’s recipe. I cooked a large pork roast and divided it into 4 packages. I froze 3 then started searching for casseroles with pork in them. Anything but pulled pork sandwiches. I found this one, and the only thing I did differently is add mushrooms. It is so good and makes a large casserole. Pulled Pork King Ranch CasseroleMakes 8 Servings
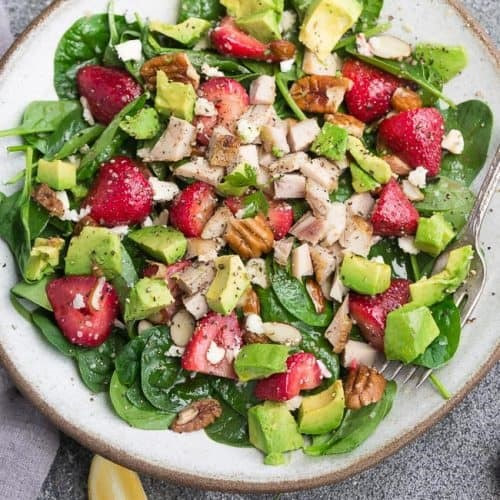
Ingredients 6 tablespoons Unsalted Butter 1 cup Chopped Red Onion 1 Red Bell Pepper, diced 1 Green Bell Pepper, diced 3 cloves Garlic, minced 1 teaspoon Ground Cumin 1 tablespoon Chili Powder 1 teaspoon Salt 1/2 teaspoon Ground Black Pepper 1/4 cup All-Purpose Flour 1 3/4 cups Beef Broth, or mushroom, veggie, or chicken broth 1 10 ounce can Chunky Diced Tomatoes and Green Chiles, drained 1 1/2 cups Sour Cream, plus more for topping 2 pounds Pulled Pork 4 cups Shredded Monterey Jack Cheese 18 Corn Tortillas, white or yellow 1/4 cup Canola Oil Fresh Cilantro, optional Directions 1. Preheat oven to 350°F. Spray 3-quart baking dish with cooking spray and set aside. 2. In a large skillet over medium heat melt the butter. Once melted add the red onion, and bell peppers. Allow to cook for several minutes, stirring occasionally, until tender and browned. 3. Add in the garlic, cumin, chili powder, salt, and black pepper. Stir to coat the veggies in the seasonings. 4. Sprinkle the flour into the skillet. Stir to coat the veggies in the flour; you will end up with a thick paste. 5. Pour in the beef broth and stir. Bring mixture to a boil while stirring and let simmer while stirring for about 2-3 minutes until thick. Remove from heat, allow to cool for about 2 minutes and stir in the diced tomatoes with green chiles and the sour cream. Stir to combine. Add the shredded pork and stir until mixed. Set aside. 6. Heat a large griddle or skillet over medium heat. Brush the tortillas with the canola oil on both side and heat on the griddle until crisp and browned on each side. 7. Once all tortillas are browned, layer 6 tortillas on the bottom of the baking dish. Layer the tortillas to cover as much of the dish as possible. Top with half of the pork mixture then one third of the cheese. Repeat by layering 6 more tortillas, the remaining half of the pork mixture, and .one third of the cheese. Top with the remaining tortillas and the rest of the cheese. 8. Cover the baking dish with foil and bake for 15 minutes. Remove the foil and bake another 10 minutes. I’m not ready. Four months until Christmas. Where has this year gone? I have bought two presents, only because they were on sale. As far as thinking about gifts for everyone else, I have no clue. I’m not going to worry about that right now. I have to get Abducted published. It was supposed to be out in August, but there has been problem after problem. I’ve gone through it five times and was scared to check it again. I’ve sent it to the poor lady who is getting it ready to publish and, bless her loving heart, she deserves a raise. It has been a real nightmare for both of us. But with a lot of prayers, I’m hoping this is it, and Abducted should be ready for you this week. I do have some great news, though. I have had several people tell me that Taken is one of the best books they have read in a while. It is the sequel to Abducted and the continued story of Cody and Dani. I have named this series, the Davis Series. Remember, I told you it was written over fifteen years ago and has sat all this time. I lost the thumb drive it was on and thought I had lost it forever. I started writing it from memory. Then I wondered if it might still be on my old laptop, and there it was. I critiqued it, rewrote it, and made corrections. It was easier than Abducted. I know you will love it as much as I do. Just be sure to leave a review on Amazon. With our small air conditioner going out, hubby having a melt-down, and trying to keep Nicholas in line, it has been a wild time. I have been so wrapped up in getting these two stories out, I haven’t had time to think about food, but I came up with a recipe from my favorite Food Network star Ree Drummond, The Pioneer Woman. It’s a KETO Diet friendly recipe, which I have lost ten pounds on. Strawberry Spinach Salad |

